
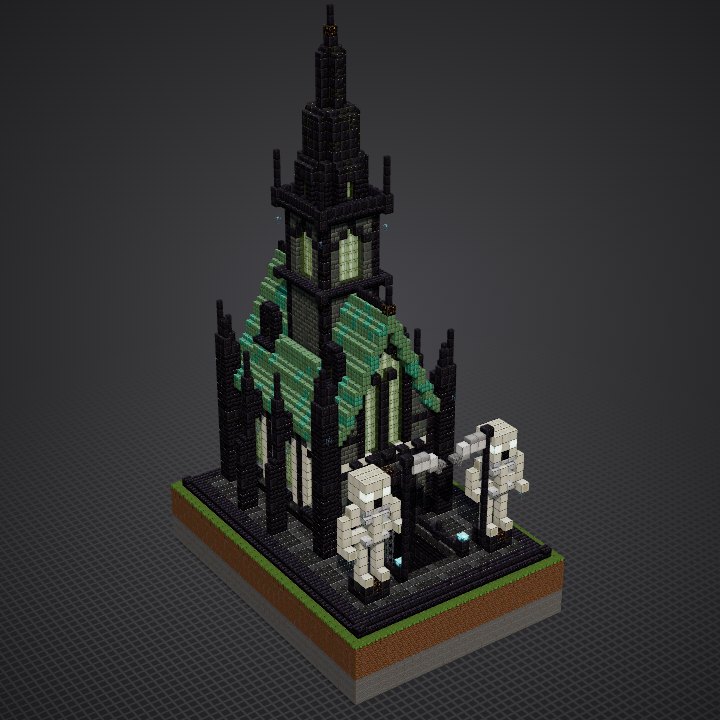
How to build the Necromancer Crypt in Minecraft
the palette · 20 steps · 5 techniques
The palette
Tuff bricks and polished tuff for the walls of the nave and the tower, raw tuff and cobbled deepslate where they wear near the ground; polished blackstone bricks (some cracked), polished blackstone and chiseled polished blackstone for the frame: base course, pilasters, buttresses, arches and pinnacles, with gilded blackstone for keystones; deepslate tiles and polished deepslate for the platform; weathered and oxidized cut copper for the roof; bone blocks for the window frames, the frieze and the skeletons, polished diorite for their ribs and jaws; green stained glass panes lit by verdant froglights behind them; iron bars for the grille, iron blocks for the scythe blades, polished blackstone walls and chains for the spikes, soul lanterns and soul campfires for the cold fire.
Techniques
- A black frame on grey walls
- Light behind the glass
- Flying buttresses
- A sunken entrance
- A needle on a drum
The steps
- Dig the crypt stairwell
- Black stone platform
- Stairwell walls and the stair down
- Crypt portal: two orders of pointed arches
- Iron grille and the crypt's vestibule
- Nave walls and the black base course
- Green lancet windows
- Flying buttresses on spiked piers
- Corner piers and their pinnacles
- Bone frieze and the great green window
- Steep roof of weathered copper
- Green lucarnes and the ridge crest
- Tower: the lower stage
- Tower: the belfry of green fire
- Tower: corbels, parapet and pinnacles
- The black needle spire
- Guardians: pedestals and skeletons
- Guardians: skulls with green eyes
- Guardians: scythes and soul lanterns
- Soul lanterns on chains
How each technique is done and every step explained, in 3D: Learn (members).